Fall is the best time of year! I love the cooler temperature. It’s still nice during the day and the evenings are cool and great for blankets and cuddling.
The leaves are turning. The colors are fabulous! My favorite color palette ever!
I made a couple of fun Fall projects last week; both involving pretty Fall paper.
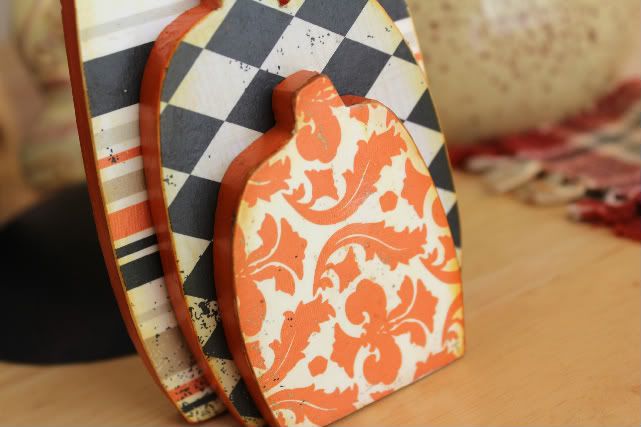
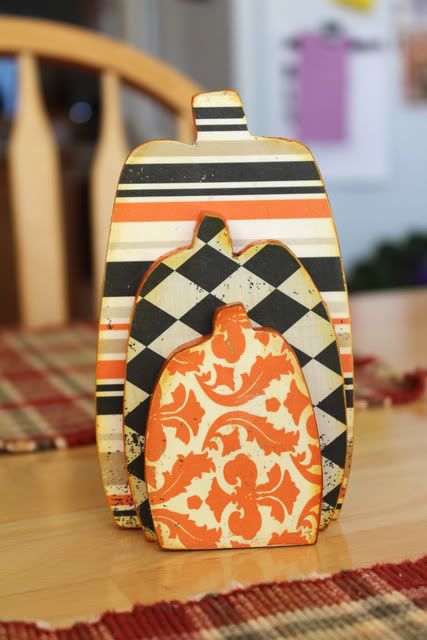
I found this trio of pumpkins cut from pine. They were on sale for $1 at my local craft store. Can you imagine the wheels turning in my head? I painted the edges with Americana acrylic paint, traced each pumpkin onto beautiful designer paper, cut out and attached to the wood with Mod Podge. After it was dry, I sponged the edges with Tim Holtz distress ink – Wild Honey. Isn’t that just a delicious name for an ink color? I then painted the entire project with a top coat of Mod Podge to seal it.
This pretty little shelf sitter is sitting on the table in my entry.

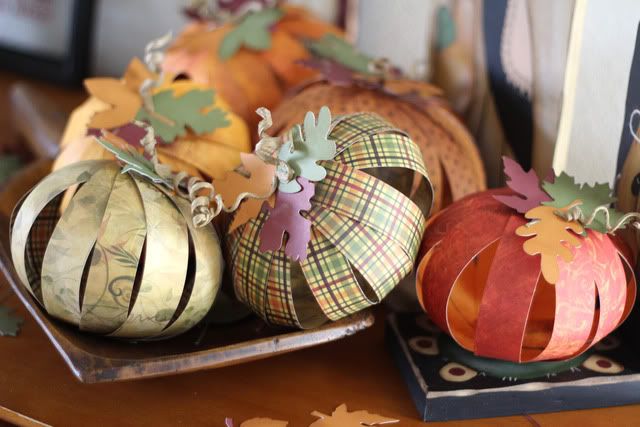
And speaking of pumpkins… I made a few more out of 1” paper strips. 12 to be exact. Craft Warehouse had a nice selection of papers to choose from. I held each group of strips together with a brad at each end and fanned them open into a pretty pumpkin shape.
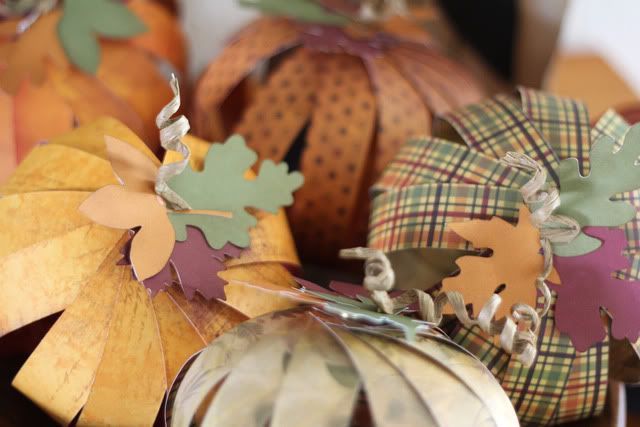
I cut the leaf shapes out with my Silhouette, then sponged the edges with vintage photo distress ink.
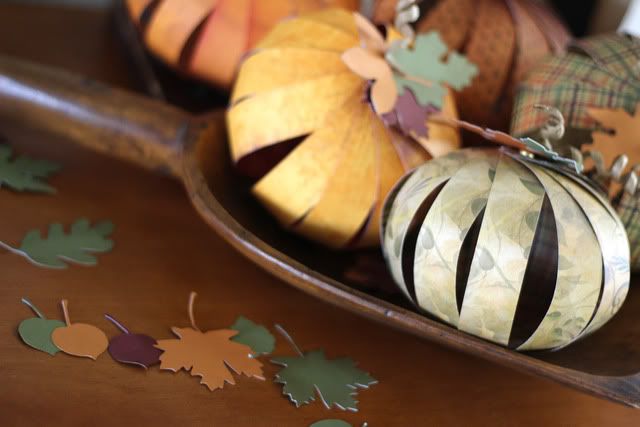
I found a spool of raffia that has wire in the middle. I wrapped around a pencil to make a little curly vine.
I hope you’re all enjoying this beautiful time of the year. Relax and enjoy it!
Be Creative!
The leaves are turning. The colors are fabulous! My favorite color palette ever!
I made a couple of fun Fall projects last week; both involving pretty Fall paper.

I found this trio of pumpkins cut from pine. They were on sale for $1 at my local craft store. Can you imagine the wheels turning in my head? I painted the edges with Americana acrylic paint, traced each pumpkin onto beautiful designer paper, cut out and attached to the wood with Mod Podge. After it was dry, I sponged the edges with Tim Holtz distress ink – Wild Honey. Isn’t that just a delicious name for an ink color? I then painted the entire project with a top coat of Mod Podge to seal it.
This pretty little shelf sitter is sitting on the table in my entry.


And speaking of pumpkins… I made a few more out of 1” paper strips. 12 to be exact. Craft Warehouse had a nice selection of papers to choose from. I held each group of strips together with a brad at each end and fanned them open into a pretty pumpkin shape.

I cut the leaf shapes out with my Silhouette, then sponged the edges with vintage photo distress ink.

I found a spool of raffia that has wire in the middle. I wrapped around a pencil to make a little curly vine.

I hope you’re all enjoying this beautiful time of the year. Relax and enjoy it!
Be Creative!








2 comments:
omg I was looking at those paper pumpkins! They are SO SO cute! And so easy that I think even I could do that!
Love the wooden pumpkins. Those papers are perfection!
And those paper pumpkins are so adorable. I might have to do a few since I am hosting Thanksgiving in my home this year!
Post a Comment